Wardley Map Editor
Layers

Reduce time to strategic insights with layers.
Layers Availability
Layers are available on the Explorer Plan and the Villager Plan.
You can try layers for free on a Quick Map.
Overview
Mapkeep Layers are a way to organize your Wardley Maps so that you can gain strategic insights quicker. Layers simplify presentations, facilitate competitive analysis, and enable scenario planning. This overview explains how layers function in the Wardley Map editor.
When you create a new Wardley Map, it has no layers. By default, when you add components and links to the map, they do not belong to any layer.
How Layers Work
Layers are used to organize and manage the display of information or components. Here's how they function:
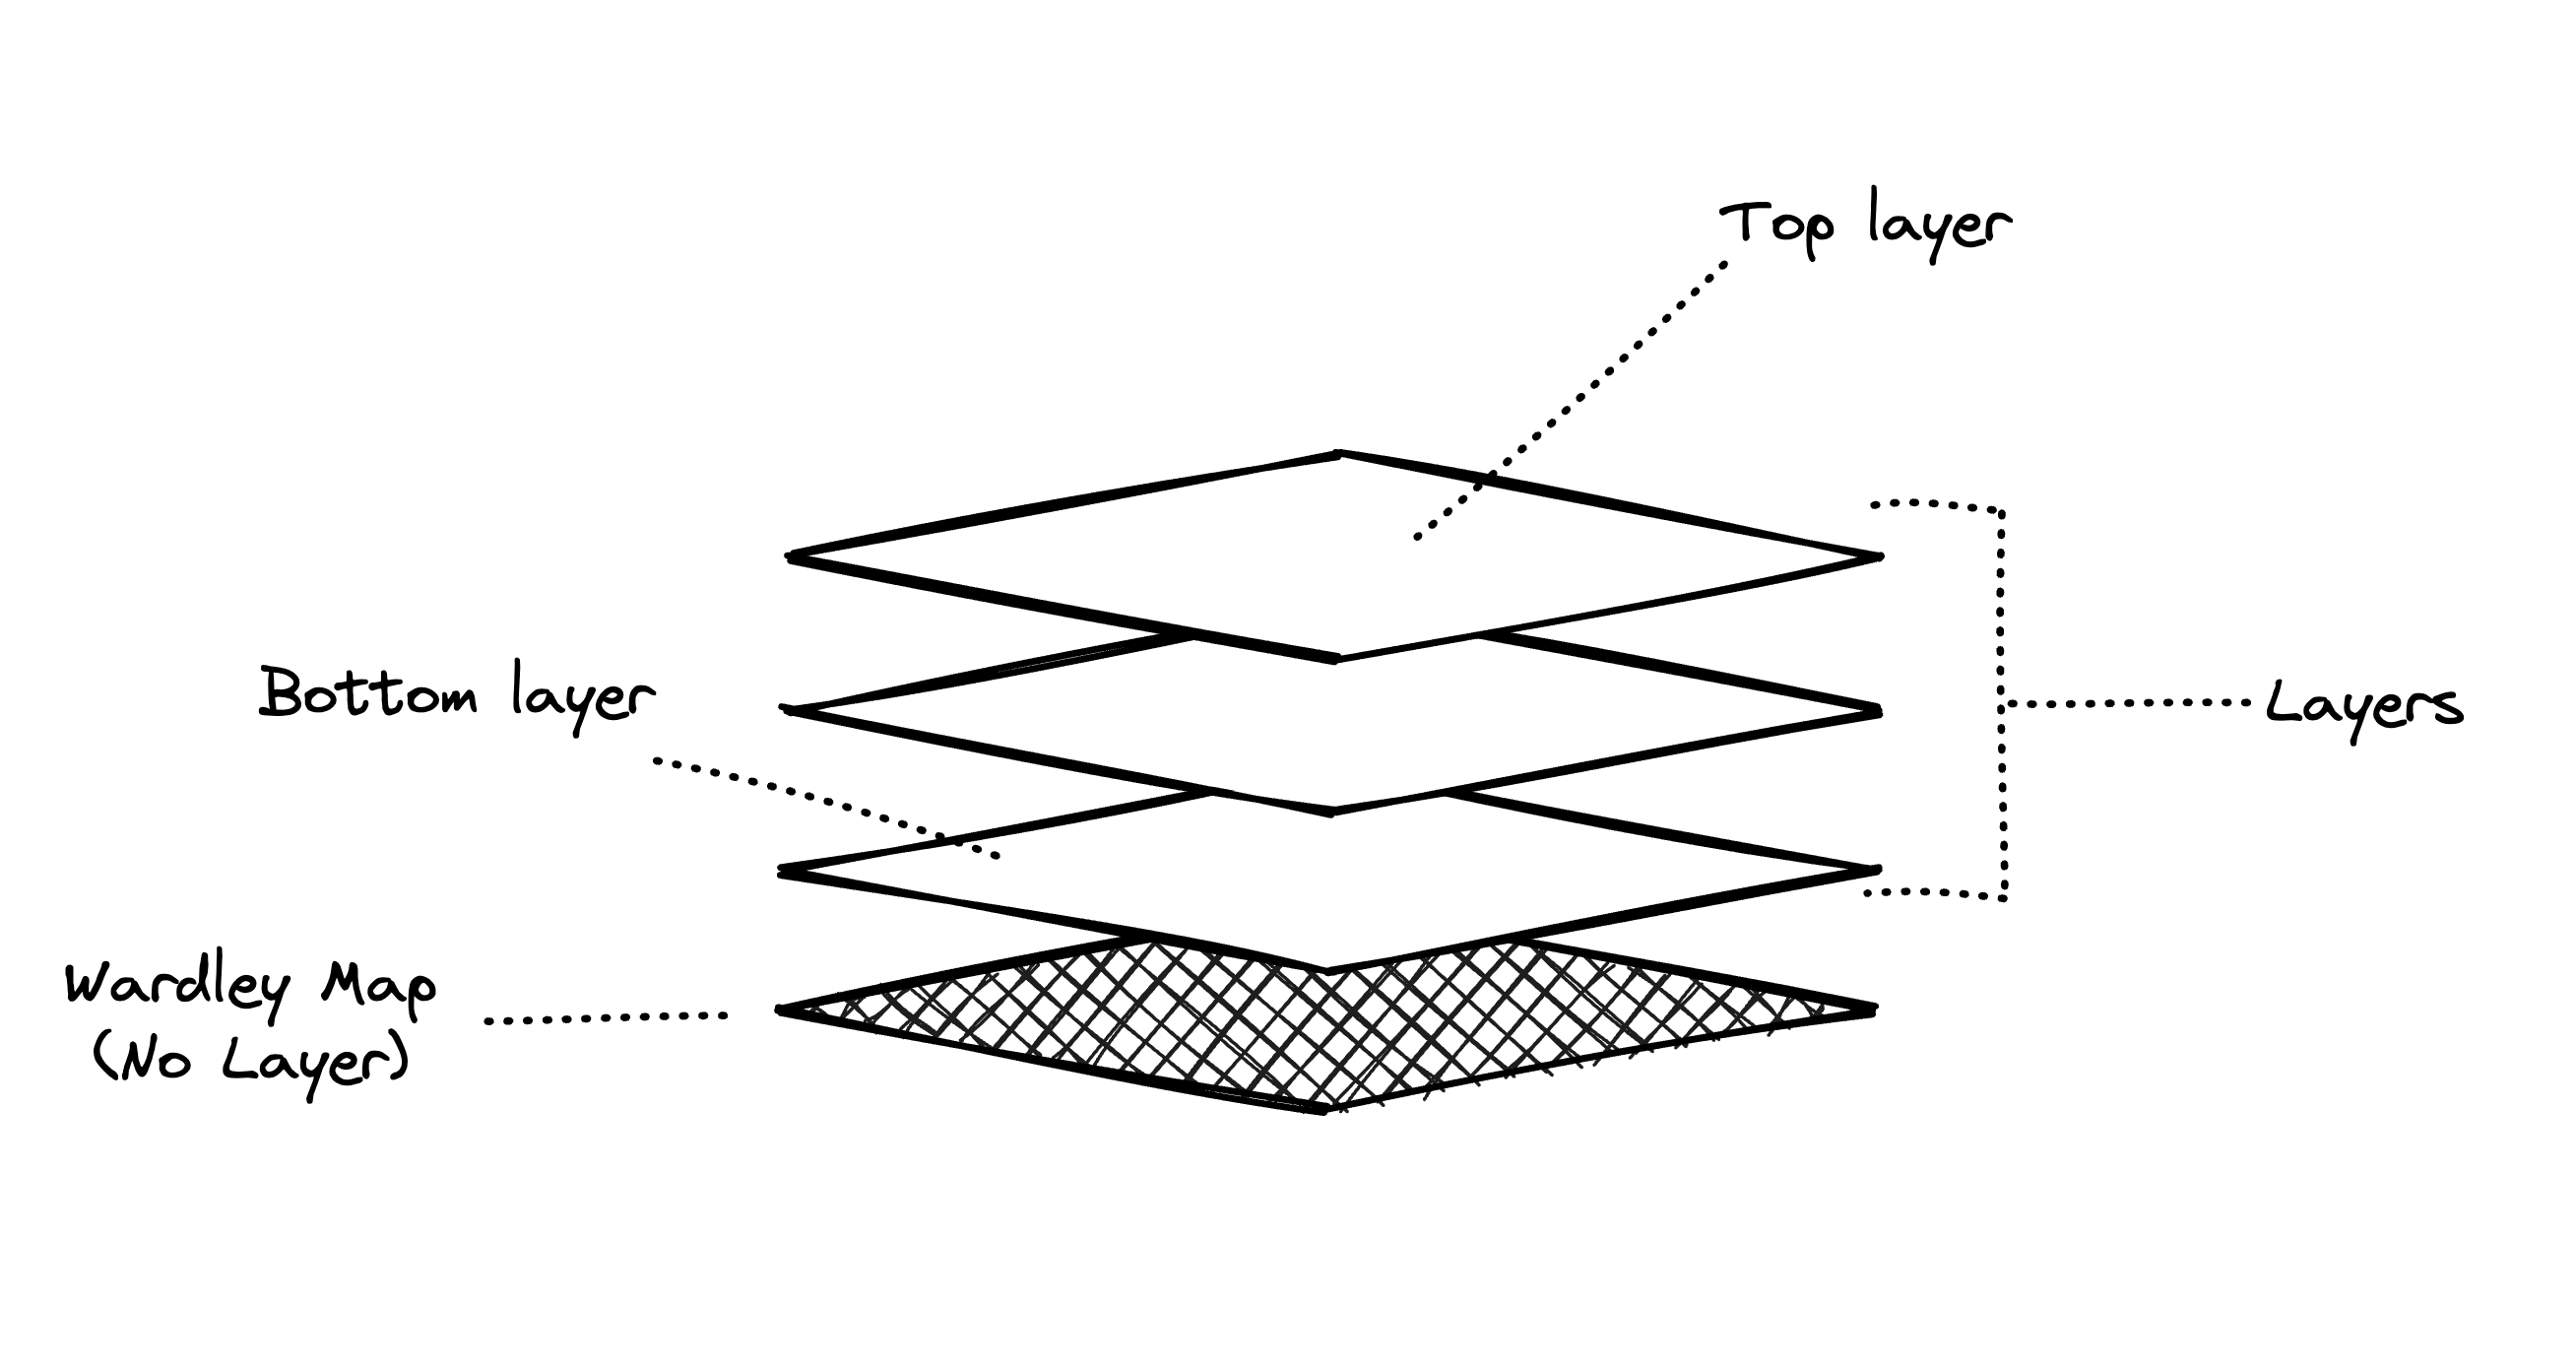
- Top layer: This is the uppermost layer (also referred to as the "front"). Content drawn on this layer appears above (in front of) content on all other layers, making it the most visible.
- Intermediate layers: These layers are in the middle. Content on these layers is drawn after the bottom layer but before the top layer. Content in each layer is drawn above (in front of) the content of the layer below it.
- Bottom layer: This is the bottommost layer (also referred to as the "back"). Content on this layer is drawn first and appears underneath (behind) all other layers.
- Wardley Map (No Layer): This is the content without any layer and serves as the base upon which all other layers are built. It is not a layer itself, but all layer content will be drawn on top (in front) of it.
Layers help organize and draw content in a clear order. Each layer adds to the overall picture and makes complex information easier to understand.
Layers panel
To access the Layers panel, in the Wardley Map editor, click on the Wardley Map icon in the Creation Bar, then click on the Layers icon. The panel will slide out and become visible.
Add a layer
To add a layer, click the + Add Layer button in the Layers panel. A new untitled layer will be created on the bottom.
To add a layer in a specific place, use the Layer menu and select Insert layer in front to add a new layer in front of the selected layer.
Rename a layer
You can rename a layer by double clicking on its name in the Layers panel. Type in the new layer name and press Enter.
Layers can also be renamed by using the Layer menu and selecting Rename. Type in the new layer name and press Enter.
Show/Hide a layer
To show or hide the layer and its contents, you can click on the visibility indicator icon to the left of the layer name. Clicking on this icon will toggle the layer visibility.
A muted visibility indicator with a line across it indicates that the layer is hidden. A visibility indicator without a line across it indicates that the layer is visible.
Alternatively, you can show or hide the layer by using the Layer menu and selecting Show or Hide.
Additionally, when a component or a link belonging to a layer are selected, their layer can be hidden by clicking the Hide layer icon in the Toolbar.
Delete a layer
Deleting a layer only deletes the layer itself. The layer contents are not deleted. When a layer is deleted, its contents are no longer assigned to a layer. The contents will be visible on the map alongside all content not assigned to a layer.
To delete a layer, use the Layer menu and select Delete.
Reorder layers
To reorder the layers, you can drag and drop then in the Layers panel.
You can also reorder the layers by using the Layers menu and selecting one of the ordering options: Move to front, Move frontwards, Move backwards, Move to back.
Add content to layers
To add existing content to a layer, select the component or link and in the Toolbar select Assign layer. A list of layers along with an indicator showing the currently assigned layer will be shown. To assign to a different layer, click on any of the other layers. You can assign more multiple components and links at once.
To create new content in a layer, you can activate a layer and any content created will be automatically assigned to it.
Activate/Deactive a layer
Layers can be activated by clicking on them in the Layers panel. When a layer is active, it will be outlined in the Layers panel. The Wardley Map itself will also be outlined and a message indicating which layer is active will appear on the bottom of the screen.
When a layer is active, any created content will be automatically assigned to the layer.
To deactivate an active layer, click on it again in the Layers panel. Active layer indicators will disappear.
Only one layer can be active at a time.
Closing the Layers panel
To close the Layers panel, click on the X icon in the upper right corner of the panel. The panel will slide out of view.